
Oreo Ice Cream Cake
Introduction
If you have a sweet tooth and a penchant for desserts, you need to try making an Oreo Ice Cream Cake. This delightful treat combines the rich creaminess of ice cream and the beloved chocolatey crunch of Oreos, making it a perfect dessert for any occasion. Whether you’re enjoying a summer barbecue or celebrating a birthday, this refreshing dessert will leave everyone craving more. In this blog post, we will guide you step-by-step on how to create your very own Oreo Ice Cream Cake, ensuring that you impress your friends and family with your culinary skills.
Ingredients List
For your Oreo Ice Cream Cake, you will need the following ingredients:
– 24 Oreo cookies (crushed)
– 1/4 cup unsalted butter (melted)
– 1 quart vanilla ice cream (softened)
– 1 quart chocolate ice cream (softened)
– 1 cup whipped cream (for topping)
– Additional Oreo cookies (for garnish)
– Chocolate syrup (optional, for drizzling)
Timing
The preparation time for this delicious Oreo Ice Cream Cake is quite manageable. Here’s how long each step will typically take:
– Prep Time: 20 minutes
– Freezing Time: 4-6 hours or overnight (for best results)
– Total Time: Approximately 4-6 hours or overnight
Dedicating the proper amount of time to freeze the layers is essential, as it ensures the cake holds its shape when served.
Step-by-Step Instructions
Creating your Oreo Ice Cream Cake is a straightforward process. Follow these detailed steps to bring the recipe to life:
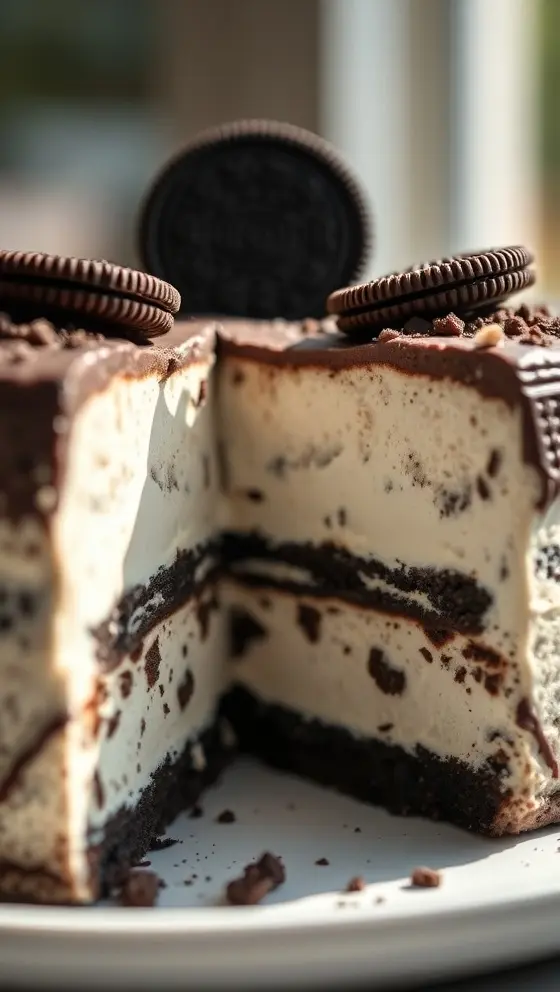
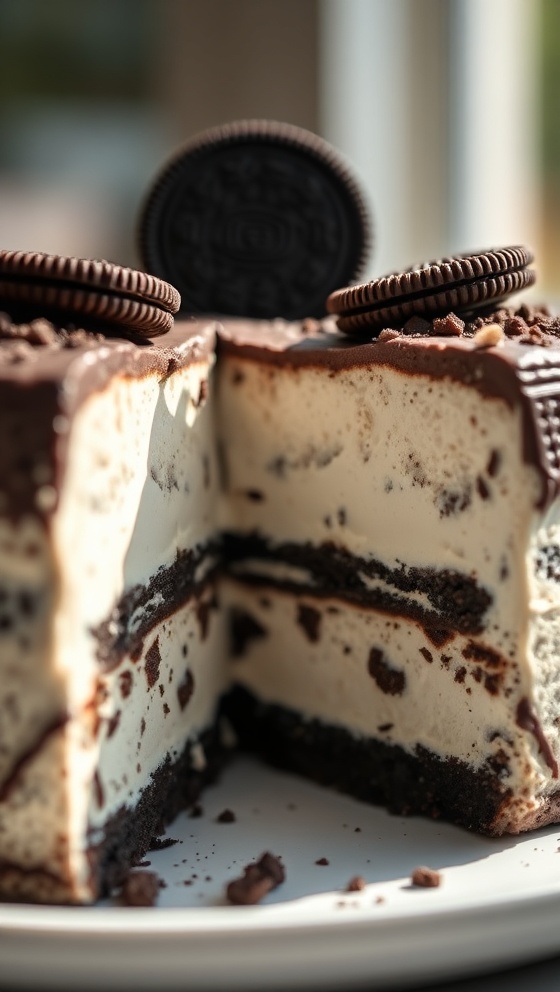
1. Prepare the Crust: In a mixing bowl, combine the crushed Oreo cookies with the melted butter. Mix until the cookies are fully coated in butter, forming a cohesive crust mixture.
2. Press the Crust: Take a 9-inch springform pan and evenly press the Oreo crust mixture onto the bottom of the pan. This creates a solid base for your cake.
3. Layer the Vanilla Ice Cream: Take one quart of softened vanilla ice cream and spread it over the crust. Use an offset spatula to make sure it’s evenly distributed.
4. Freeze the First Layer: Place the pan in the freezer and let it chill for about 1-2 hours until the vanilla layer is firm.
5. Add the Chocolate Ice Cream: Once the vanilla ice cream layer is firm, spread the softened chocolate ice cream over the vanilla layer. Again, distribute it evenly for a beautiful presentation.
6. Freeze Again: Return the cake to the freezer for another 2-4 hours to let the chocolate layer solidify. Opting for a longer freeze is advisable if you’re planning to serve it later.
7. Whipped Cream Topping: After the ice cream layers are set, remove the cake from the freezer. Cover the top with whipped cream, creating a thick layer that makes for a stunning appearance.
8. Garnishing: Crush additional Oreo cookies and sprinkle them on top of the whipped cream. You can also drizzle chocolate syrup for a luxurious touch.
9. Final Freeze: Place the assembled cake back in the freezer for about 30-60 minutes before serving to ensure everything is nicely set.
10. Serve and Enjoy: Carefully remove the sides of the springform pan and slice your Oreo Ice Cream Cake into wedges. Serve immediately and watch your guests’ faces light up with delight.
Nutritional Information
Understanding the nutritional composition of your Oreo Ice Cream Cake can help you enjoy these indulgent flavors in moderation. Here’s a breakdown of the estimated nutritional information per slice (assuming 12 servings):
– Calories: 320
– Total Fat: 18g
– Saturated Fat: 10g
– Cholesterol: 45mg
– Sodium: 180mg
– Total Carbohydrates: 39g
– Dietary Fiber: 1g
– Sugars: 25g
– Protein: 4g
Keep in mind that the values can vary based on brands and specific ingredients used.
Tips
To achieve the best results with your Oreo Ice Cream Cake, here are some valuable tips:
– Choose Quality Ice Cream: Opt for high-quality ice cream brands for the best flavor and texture.
– Soften Ice Cream Gradually: Let the ice cream soften at room temperature for about 15-20 minutes before spreading it onto your cake layers.
– Use Room Temperature Tools: Ensure that your spatula and mixing tools are at room temperature for easier spreading.
– Let it Set Overnight: If you have time, letting your cake sit in the freezer overnight allows flavors to meld beautifully and textures to firm up.
Alternative Methods
While the classic version of this Oreo Ice Cream Cake is scrumptious on its own, here are some creative variations to experiment with:
– Flavor Combinations: Instead of vanilla and chocolate, try other flavors like mint chocolate chip and cookies and cream for a twist.
– Add Fruits: Mix in sliced strawberries or bananas into the ice cream layers for a fruity element.
– Make It Dairy-Free: Use dairy-free ice creams or coconut whipped cream to create a decadent vegan version.
Common Mistakes to Avoid
As you embark on this delicious journey, be aware of the following common pitfalls:
– Not Softening Ice Cream Properly: Trying to spread hard ice cream can lead to uneven layers. Always allow it to soften.
– Skipping the Freezing Time: Don’t rush the freezing process; too little time can lead to a melting mess instead of a structured cake.
– Overfilling the Layers: While it’s tempting to pile on the ice cream, ensure that each layer is even for a clean presentation.
Conclusion
Creating an Oreo Ice Cream Cake is a rewarding experience that brings together the best of both worlds: delicious ice cream and beloved Oreo cookies. Following the above steps will help you successfully craft this dessert, perfect for any gathering or personal craving. So gather your ingredients and get ready to wow your guests with this delightful treat. Remember to showcase your creation on social media, and don’t hesitate to return to my website for more exciting recipes. Explore, experiment, and enjoy every bite of your homemade Oreo Ice Cream Cake!
FAQs
Q: Can I use other cookies instead of Oreos?
A: Absolutely! Feel free to experiment with other chocolate sandwich cookies or even graham crackers for a unique twist.
Q: How long can I store the Oreo Ice Cream Cake?
A: You can store it in the freezer for up to a week. However, it’s best enjoyed fresh.
Q: Can I decorate the cake with fruits?
A: Yes! Adding fresh fruits can introduce a zesty flavor, enhancing the overall dessert experience.
By following this comprehensive guide, you’ll not only achieve a delicious Oreo Ice Cream Cake but also become more confident in your dessert-making abilities. Happy cooking!
Oreo Ice Cream Cake
Ingredients
- 24 Oreo cookies, crushed
- 1/2 cup butter, melted
- 4 cups vanilla ice cream, softened
- 1 cup whipped cream
- Chocolate syrup, for drizzling
- Additional Oreo cookies, for topping
Instructions
- Preheat the freezer.
- In a bowl, mix crushed Oreo cookies with melted butter.
- Press the mixture into the bottom of a springform pan to form the crust.
- Spread softened vanilla ice cream over the crust and smooth it out.
- Top with whipped cream and drizzle with chocolate syrup.
- Freeze for at least 4 hours or until firm.
- Before serving, garnish with additional crushed Oreos.
- Slice and enjoy your Oreo Ice Cream Cake!
Nutrition Information
- Calories: 350 kcal
- Protein: 5g